GS Balance mobile application user guide


Read this user guide before starting to use GS Balance
Intended use
GS Balance is intended for collecting, storing, viewing and analyzing self-measurement, self-evaluation and medication data produced by patients with the chronic condition of asthma, diabetes or hypertension. The remotely collected data and results of the data analysis are intended to provide information for the clinician to take decisions with therapeutic purposes. GS Balance is not intended to be used as a substitute for professional healthcare advice.
Warning
GS Balance does not make measurements, decisions or interpret anything based on the information it transmits, and it is not intended to provide automatic treatment recommendations or act as a substitute or alternative to professional health care recommendations. All medical diagnoses and treatment must be done under the supervision of a healthcare professional.
GS Balance is not intended for monitoring of critical conditions.
Technical requirements
GS Balance application requires Android version 6.0 or higher, or iOS version 15.0 or higher to run.
Before you start to use the GS Balance application
- Please enable lock screen in your mobile device, so that other people won't be able to access personal health data.
- Remove any other applications from your phone that might be receiving measurement results from your blood glucose or PEF meter (e.g. the meter manufacturer's own application).
Important
Keep your account password to yourself, so that other people won't be able to access personal health data. You should not tell your GS Balance account password to anyone or send it to anyone via email or instant messaging services. Also, it is not advisable to write your password down on a piece of paper.
Please note that some of the features covered in this user guide might not be available in your version of the GS Balance application, as the feature selection is determined by your care provider. In this case you can ignore the chapters that do not apply to you.
GS Balance application supports wireless transfer of readings from the following meters:
- Smart One spirometer (manufacturer: MIR)
- Blood glucose meters: CareSens Dual, CareSens N Premier (manufacturer: i-SENS), Contour Next One (manufacturer: Ascensia)
Logging in
When starting GS Balance for the first time, you will see a login screen. Log in to the GS Balance application with your email address (the one that your GS Balance account was created with) and a password.
Main menu
The main menu has options for different values that you can report to the GS Balance service. Tap on a symbol to enter the view you want. There is also a view for Meters (connected devices), and a help view.
After entering any of these views, you can get back to this main menu by tapping the arrow button on the top left corner of the screen.
Blood glucose
A logbook for your blood glucose readings. For each measurement the following stats are shown: measurement value, timestamp, possible tags, an additional information symbol (if the value has additional information).
By tapping on a blood glucose value, you can see the details and possible additional information for that value. The tags can be edited (a tag can be added, removed, or changed to another by tapping on the symbols), and additional information can be added or edited (tap on the additional information field and you can write on it). Tap on the save button to save any possible changes you have made.
If your clinic has enabled manual blood glucose entries, you can add a new value manually by tapping on the + symbol on the upper right corner of the screen. Enter the date and time (current date and time is set by default), enter the dose value, and add a tag if applicable. You can also add additional information by tapping the additional information field and writing on it. Tap on the save button to save the new value.
If you notice a mistake, by tapping on a blood glucose value on the list you can edit the value and information related to it. Tap on the save button to save any possible changes you have made.
Insulin
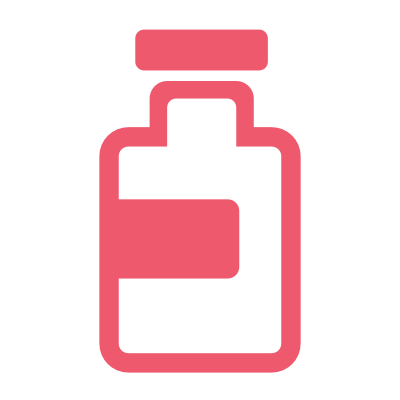
This view lists all the insulin dose values that are entered into your Balance account. Along with the insulin dose values, the date and time as well as an additional information symbol (if the value has additional information) are shown.
By tapping on the + symbol on the upper right corner of the screen, you can add a new insulin dose value. Enter the date and time (current date and time is set by default), select the drug, and enter the dose value. Carbohydrates input is available in context of fast acting insulin. You can also add additional information by tapping the additional information field and writing on it. Tap on the save button to save the new value.
If you notice a mistake, by tapping on an insulin value on the list you can edit the value and information related to it. Tap on the save button to save any possible changes you have made.
Blood pressure
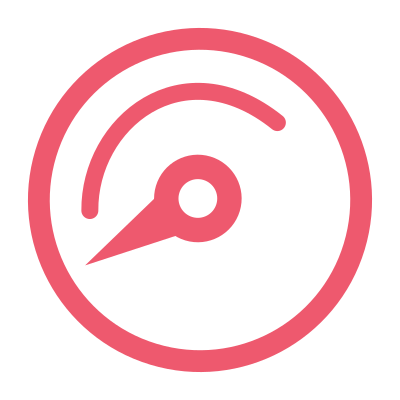
This view lists all the blood pressure values that are entered into your Balance account. You can add new blood pressure (and pulse) values and edit existing values.
By tapping on the + symbol on the upper right corner of the screen, you can add a new blood pressure value. Enter the date and time (current date and time is set by default) and enter the blood pressure value. Entering a pulse value is optional. You can also add additional information by tapping the additional information field and writing on it. Tap on the save button to save the new value.
If you notice a mistake, by tapping on a blood pressure value on the list you can edit the value and information related to it. Tap on the save button to save any possible changes you have made.
Weight
This view lists all the weight values that are entered into your Balance account. You can add new weight values and edit existing values.
By tapping on the + symbol on the upper right corner of the screen, you can add a new weight value. Enter the date and time (current date and time is set by default) and enter the weight value. You can also add additional information by tapping the additional information field and writing on it. Tap on the save button to save the new value.
If you notice a mistake, by tapping on a weight value on the list you can edit the value and information related to it. Tap on the save button to save any possible changes you have made.
PEF (Peak Expiratory Flow)
This view lists all the PEF records that are entered into your Balance account. You can add new PEF records and edit existing ones.
By tapping on the + symbol on the upper right corner of the screen, you can add a new PEF record. Enter the date and time (current date and time is set by default), enter the PEF values, and select whether the measurements were made before or after medication. Select also whether the record is part of a follow-up period or symptom based. You can also add additional information by tapping the additional information field and writing on it. Tap on the save button to save the new value.
Transferring PEF measurement results directly from a Smart One PEF meter to Balance via Bluetooth connection is also possible by tapping on the Bluetooth icon (see the Smart One PEF meter section in this user guide for further instructions).
If you notice a mistake, by tapping on a PEF entry on the list you can edit the values and information related to them. Tap on the save button to save any possible changes you have made.
Work PEF (PEF workplace monitoring)
This view lists all the PEF workplace monitoring records that are entered into your Balance account. You can add new PEF records and edit existing ones.
By tapping on the + symbol on the upper right corner of the screen, you can add a new PEF record. Enter the date and time (current date and time is set by default), enter the PEF values, and select whether the measurements were made at work or off work. You can also add additional information by tapping the additional information field and writing on it. Tap on the save button to save the new value. You will be asked if you wish to get a reminder for measuring again after 2 hours.
Transferring PEF measurement results directly from a Smart One PEF meter to Balance via Bluetooth connection is also possible by tapping on the Bluetooth icon (see the Smart One PEF meter section in this user guide for further instructions).
If you notice a mistake, by tapping on a PEF entry on the list you can edit the values and information related to them. Tap on the save button to save any possible changes you have made.
Asthma Control Test
This view lists your completed Asthma Control Test (ACT™) questionnaires.
By tapping on the + symbol on the upper right corner of the screen, you can start filling a new ACT questionnaire. Select the answers by tapping on the option of your choosing. Finally tap on the Save button, and you will see the results (total score and its interpretation). You can get back to the list of filled questionnaires by tapping on the OK button.
If you notice that you have made a mistake when filling an ACT questionnaire, you can tap on the result and edit individual answers. Tap on the Save button to save any possible changes you have made.
Asthma Control Test (ACT™) © 2002, 2004, 2011 QualityMetric Incorporated. All rights reserved.
ACT™ is a trademark of QualityMetric Incorporated.
Asthma attack
This view lists your completed asthma attack questionnaires.
By tapping on the + symbol on the upper right corner of the screen, you can start filling a new asthma attack questionnaire. Select the answers by tapping on the option of your choosing. Finally tap on the Save button.
If you notice that you have made a mistake when filling an asthma attack questionnaire, you can tap on a filled questionnaire and edit individual answers. Tap on the Save button to save any possible changes you have made.
Meters
From here you can connect a Bluetooth meter, so that your blood glucose measurement results are transferred to the GS Balance application automatically.
Bluetooth meters - here are shown the meter(s) you have paired to your mobile device.
Add a meter - tap this button, select your meter model and follow the instructions on the screen to pair a Bluetooth meter with your mobile device.
If the transfer of results from your connected meter stops working, please open the GS Balance application and turn on the meter while the application is open on the phone's screen. This should re-establish connection and results should transfer again.
Date and time settings of blood glucose meters
It is important that blood glucose readings have correct timestamps, so that both you and the healthcare professionals know when you have measured you blood glucose.
With CareSens meters, the date and time settings of the meter are automatically updated to be the same as your mobile device's during the transfer of measurement results. Hence, after the first transfer the settings are automatically correct, and you don't need to think about the matter.
If the date and time settings of the meter were more than 1h 25min in the future during the first transfer, all the results transferred at that time are marked as invalid in GS Balance and they are not shown to you. If problems arise in this context (e.g. results with valid timestamps were marked as invalid because the time settings were incorrect only at the time of transfer), please contact GS Balance support.
With Contour meter, GS Balance cannot automatically correct the meter's date and time settings, but you will see a notification if the settings were incorrect. In this case, make sure to correct the date and time settings of the meter, so that the measurement results can be shown in GS Balance.
Smart One PEF meter
If you are using a Smart One PEF meter and an Android phone, you can transfer PEF measurement results directly from the meter to the GS Balance service via Bluetooth connection.
In the PEF or Work PEF logbook, tap on the Bluetooth icon. Make sure that the Bluetooth and location functionality are enabled in your phone's settings, and that you have the Smart One meter near the phone.
After the initial pairing process, you can tap on the "Start" button, and start making measurements with the Smart One meter. If you see several serial numbers, you can check the correct one from your device's battery compartment. You will be asked to make up to 5 measurements. After making the measurements, fill in the rest of the details for the PEF record, and tap on the "Save" button.
Help
From this view you can access the user guide and privacy policy, customer support contacts and manufacturer information.
Log out
You can log out from the application by tapping the Log out symbol on the main menu.
Symbols
 | Blood glucose |
 | Insulin |
 | Blood pressure |
 | Weight |
 | PEF (Peak Expiratory Flow) |
 | Work PEF (PEF workplace monitoring) |
 | Asthma Control Test |
 | Asthma attack questionnaire |
 | Meters |
 | Help |
 | Log out |
 | Blood glucose measurement |
 | Ketone measurement |
 | Control solution |
 | Basal insulin |
 | Bolus insulin |
 | Carbohydrates |
 | Pulse |
 | Date |
 | Time |
 | Additional information |
 | Fasting |
 | Pre-meal |
 | Post-meal |
 | Pre-sleep |
 | Peak Expiratory Flow record |
 | Before asthma medication |
 | After asthma medication |
Manufacturer information
GS Balance Oy
Kuortaneenkatu 2
00510 Helsinki
gsbalance.com

Reporting of dangerous occurrences
Any dangerous occurrences caused by this product must be reported to the manufacturer (GS Balance Oy) and to the competent authority of the state where the user is located. In Finland, the competent authority is Fimea.
Expected clinical benefits of GS Balance
The GS Balance service is used to help monitor chronic diseases (asthma, diabetes, high blood pressure) that affect the lives of millions of people. The GS Balance service offers healthcare professionals the opportunity to remotely monitor, analyze and evaluate patients' health data. This gives healthcare professionals visibility into the health status of people living with the mentioned chronic diseases remotely, and this has been found in clinical evaluation to lead to improved treatment outcomes.
LB-32 v.16